

Kali Linux
VirtualBox
Installing Tutorial
Assalamu Alaikum. how are you all I hope you are well. Today I am coming to give you detailed ideas about Virtual Machine or Virtualization and how you can run Linux or any other Operating System on WIndows or Mac through Virtualization and what to do.
I think we should all be aware of this.
If you want to learn kali linux , first of all you will download kali linux . Then search in google kali linux virtualbox download & download from the first link otherwise i wll give link in the bellow . Today i will show how to install kali linux on virtualbox & kali linux how to use . We know this kali linux best laptop becouse this proccess is for business . And kali linux is tottaly safe becouse kali linux have password system firsly you hava a kali linux default password after the installition you can change the password .
So without delay let's go to the main post.
I apologize in advance, the post is a bit long. Please take your time to read
To install Kali Linux on Windows you need to download Virtual Box first. There is no reason for tension. It's completely free.

1. If you go to Google and search by writing Virtual Box, the first website will come up.
After downloading the software, install it.
2. After installation you can see an environment like this.

3. Now after clicking on New you will see a dialog box like this virtual box.

4. In the dialog box you will give the name you want to give your operating system and make sure in which folder your driver will be placed and in this case one thing to note is that the amount of space required to install your operating system is in that folder or on the drive.
5. After setting Type Linux or Windows, now you have to do the main work. In the case of many of you, you may see that the 32-bit option is running, where the 64-bit option is not there.
In this case, you have to check one thing whether the Virtualization option is enabled on your computer or from the motherboard or from age. If Virtualization is not done, then you cannot use 64 bit virtual box, so you must enable the Virtualization option from the BIOS.
It varies from motherboard to motherboard. If you search how to turn on virtualization on your motherboard model or laptop model, you will find many resources online.
You must do virtualization from there.

=>To check if Virtualization is there, go to Performance tab from Task Manager and see at the bottom of the right side that if Virtualization is on then it will be written Enable and if it is not then it will be written Disable.
=> In that case, if it is enabled, then you don't have to do virtualization again, but if it is disabled, you must turn virtualization on. Otherwise, you will not be able to take full facilities of virtual box.

6. After clicking on the next option, you will get the option that is Memory Size to determine the RAM size. In this case, you have to be careful, never allocate more than half of your RAM size to the virtual box, reduce it as much as you can, I am using 2BG ROM for the virtual box.When selecting you will see there is a red dot or indicator. Never go past the green dot to the yellow dot or red dot. In that case your device will show that the Requirements to run Virtual Box will overlap your own PC. You will not be able to run the machine properly so be careful.
7. Then click Create A Virtual Disk option in the option that will appear and press the Create option below.

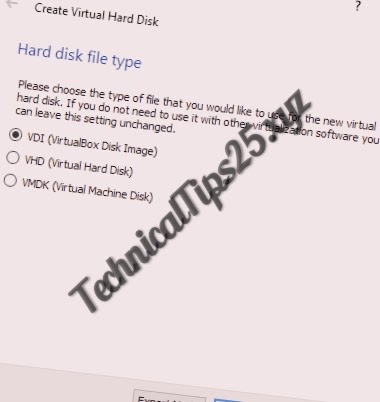
8. Select the Virtual Disk Image or VDI option in the Hard Disk File Type option
9. There are two options in this part, one is Dynamically Allocated and the other is Fixed Size. If you select Fixed Size, it will occupy a certain amount of space.
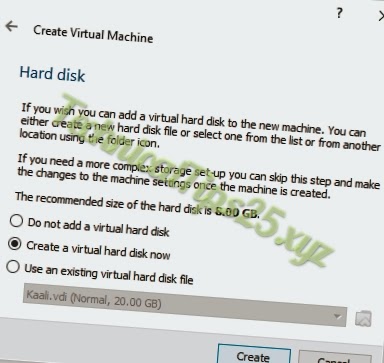

=>But in this case I would suggest Dynamically Allocated because in this case it will be seen that as much as you use the virtual machine it will increase the space as per its own requirement and it will never take more than required so no need to stress about it.
My suggestion would be Dynamically Allocated.
10. Then the option that will come where you want to keep your virtual file will be in the folder that you have already selected but now basically you have to determine the size. If you have given Fix then you will give etlist 25GB or if you have given Dynamically Allocated then there is no problem. They will automatically increase the space

- I keep it with 20 in this case.
11. After clicking on create option you will see a window like this

12. Then click on the setting option above

13. From here you can get an overview of what you have been doing so far.
14. Then you will go to the Processor tab by clicking on the System option.


15. From here you will determine how many CPU cores to allocate for your virtual machine. In this case too the warning is the same as for RAM. Do not go over the red spot. Don't give more than half of your total CPU Cores.
16. Once everything is fixed, now you can press the start button and you will see a window like this,

*** Here you have to select the ISO file. That is, the ISO file of the operating system you want to install must be selected first. You will download the ISO file of Windows / Linux as you need and keep it in a specific place and add it here.For Download Click Kali Linux in Below,
Name Of OS: Kali Linux Iso
17. Then after you press the start button the virtual machine will start running.
18. In this case, there are some rules in using the virtual box that if you move the mouse inside the virtual box once, then a mouse will remain in the window of that virtual box and will not come out. If you need to come out, press Right Control (Ctrl) of your keyboard ) button to come out from there otherwise your mouse will just move inside that window,


🔁 Let's start Kaali Linux Installation. Follow the screenshots for this
=>I will write down the points <=
=> Graphical install

=> English

=> United States

=> It will take some time.

=> Some more time

=> Stay Kali

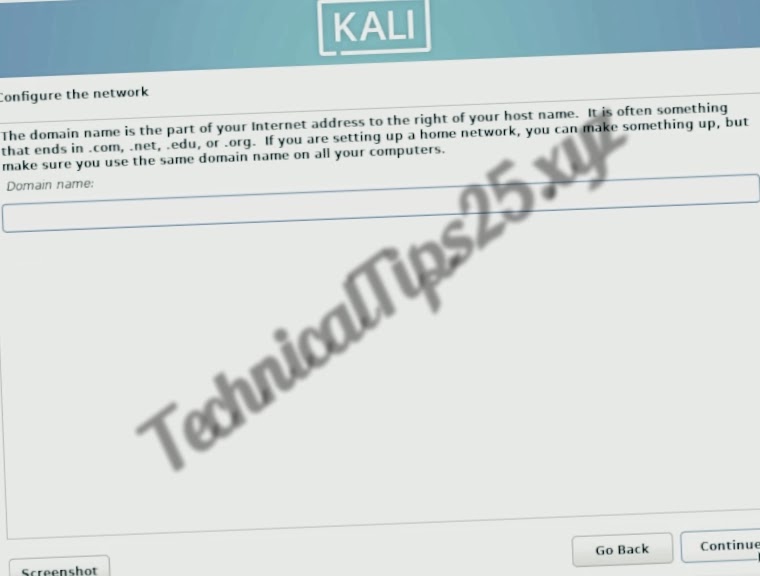
=> You can keep it blank
=> Give username according to your own.

=> Enter password
=> Confirm password

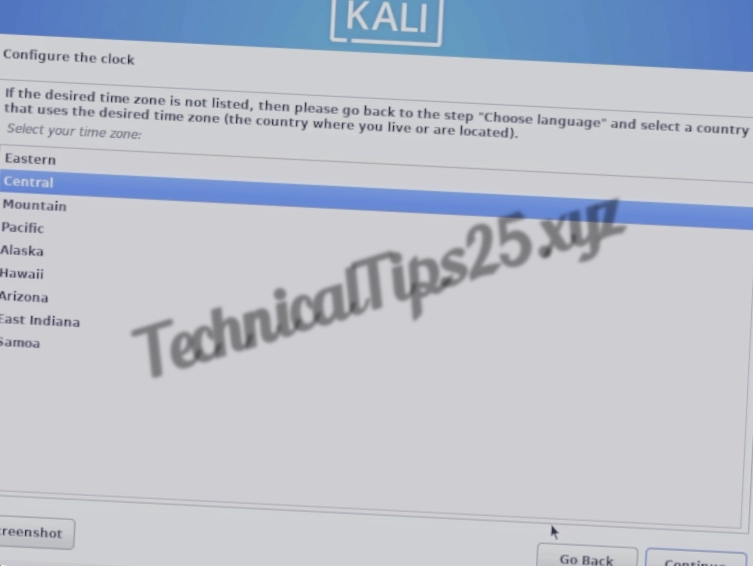
=> Time Zone: Set to Central or Near Any. Can be changed later.
=> Guided – Use Entire Disk

=>Give what you have. It is the amount you have allocated. No file will go beyond it

=>All files in one partition

=> Finish partitioning and write changes to disk

=> No will be pre-selected for final check. Do yes.

=> Sit with tea / coffee. It will take some time.

=> Continue with whatever is pre-selected


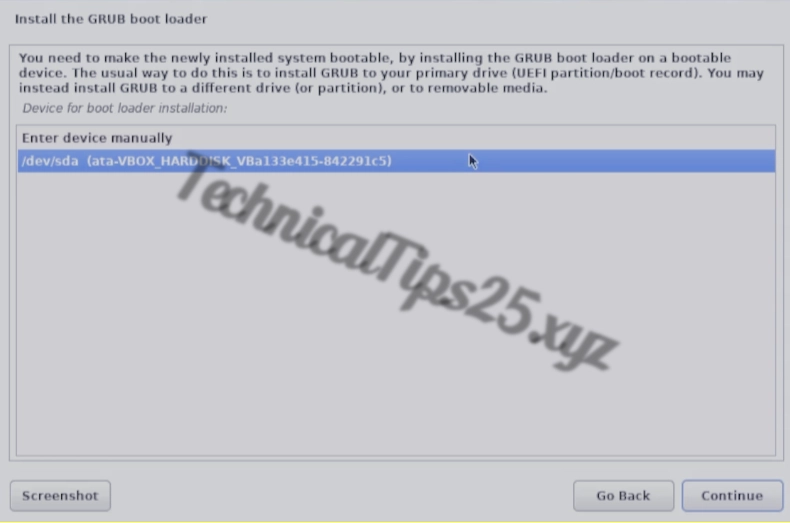
=> There will be another E besides Enter Drive Manually. Select it.
=> Installation complete. Depending on your device's performance, it may take a cup or two of tea to reach this point.

Press Continue. It will restart. Not your PC. Virtual Box will restart

=>Kali GNU/Linux
Then some writing will appear on the black screen. No need to do anything. Nothing needs to be done until the next screen.
=> I told you to remember the username and password. Log in with


Now you may find that you can't go to Windows from your Virtual Box. That is why I am quoting point 18 again.

I don't know how much I could explain or how much you benefited. But I think it is very important to learn Virtualization nowadays. You can test a lot of things, even if you want to install a software or even if you want to open a file or a virus, you can apply it first on the Virtual Machine.
In the next post , I will try to make the Virtual Machine more secure or what else can be done with it, inshallah.
Please forgive the mistakes, and if possible, let me know the mistakes so that I can correct them later.
Post a Comment